
Rust-Oleum Projects
Rust Is All The Rage
Browse Projects
-
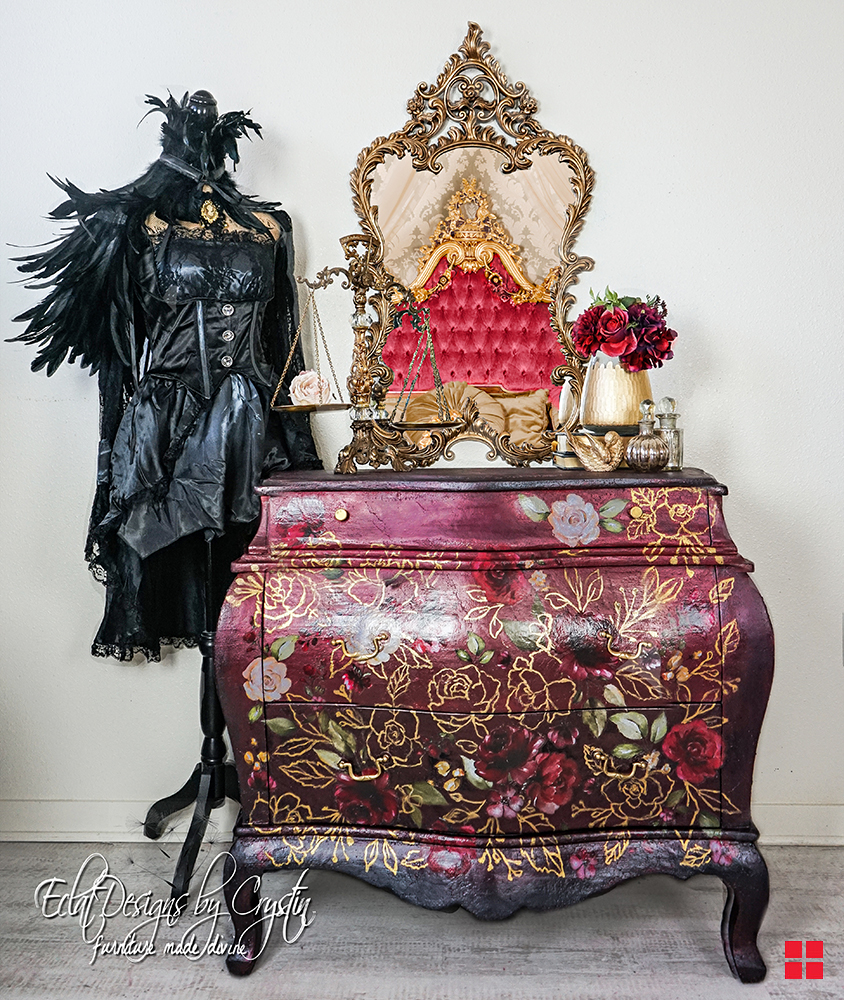
Vintage Floral Painted Cabinet
-
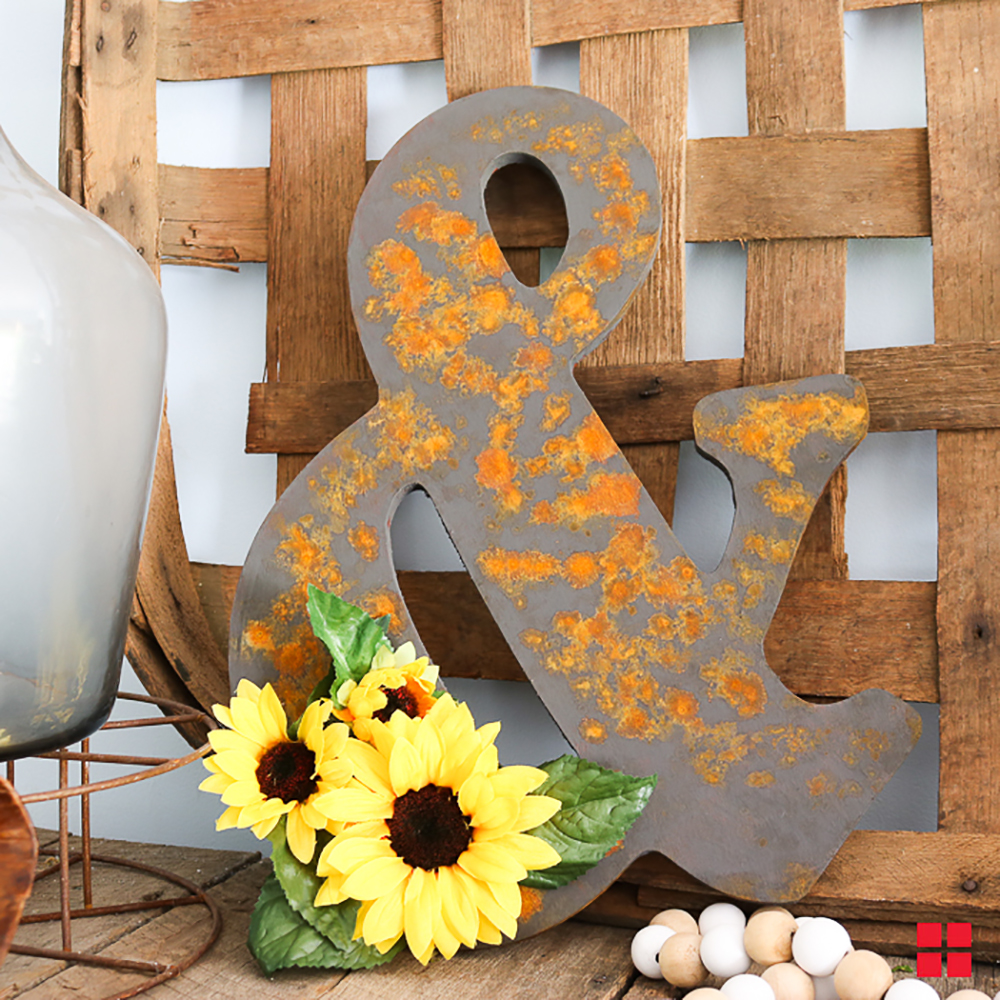
Rusty Looking Home Décor DIY
-
Estimated Time
1 Hour
-
Challenge Level
Easy
-
Tools & Supplies:
-
Eyelet Screws And Old Time Cut Nails
-
Medium Density Fiber Board Or Clear Pine
-
Jig Saw
-
Sandpaper
-
Spanish Cross Pattern 1
-
Spanish Cross Pattern 2
-
Spanish Cross Pattern 3
-
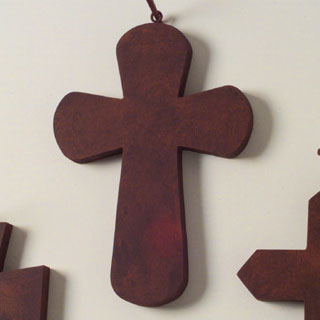
- Enlarge or reduce the patterns to the desired size using the re-sizing option or make your own pattern!
- Transfer the pattern by tracing around it onto your wood or fiber board. Cut the pattern out using a jig saw.
- Prepare the wood surface by sanding it all over. Wipe off residue with a damp paper towel and let dry.
- Affix eyelet screws to top of cross for hanging by drilling the appropriate size hole and screw in.
- Apply the American Accents® Brush-On Primer. Follow instructions on package label for preparation and drying times.
- Adding the rust finish is a two-part process. Follow the instructions outlined on the American Accents® Antique Cooper Finishes Kit. Basically, you will apply a base color to the wood pieces and cut nails. You can apply more than one coat if needed.
- After the base coat is thoroughly dry (about an hour), you'll be ready to apply the darker top coat. Follow the package instructions for application details. If you don't like the rust effect you have created, reapply the top coat.
- Once dry, accent your living room or patio with these rustic Spanish crosses!